
I can only explain it as lock-down madness, but a couple of weeks ago I decided to have a little play around with Vapor.
What I wanted to do, initially, was just make a simple website that did user authentication. You could register, login, and logout. If you were logged in, it knew who you were. If you were logged out, there were things you couldn’t see.
Now I’m no web developer. Admittedly I did write a WYSIWYG html editor in Hypercard, in about 1994, but I’m no web developer.
Ok, I might have also written a complete CMS using Hypercard as a CGI engine for MacHTTP, also around that kind of time, but honestly, I’m no web developer.
If really pressed, I might admit to having had a job creating the first interactive shopping basket for Robert Fripp’s DGM record label’s website in about 19981 - a job which I had to learn Perl for2 - but if that goes to prove anything, it is that I really am not a web developer.
Still, how hard could it be, right?
-
I was working at Abbey Road at the time. Yes, that Abbey Road. ↩
-
I still feel dirty ↩
I have been accused (by myself, mostly), of being a bit too much of a purist sometimes. It’s true that I do like things to have an intellectual rigour to them, but it’s mostly about being honest and clear with ourselves about what we’re doing and why. I welcome the application of common sense, and I’m fine with taking shortcuts as long as they’re consciously chosen for a good reason.
I’d like to think that I’m a pragmatist…
Bookish Development Diary, episode 8.
As I mentioned last time, I’ve been playing around with Github Actions, using them to build and test my Swift packages on a number of platforms.
They’re fairly easy to set up - you make a yaml file called something like Tests.yml, add it to the .github/workflows/ directory at the root of your repository, and commit.
The yaml file can contain a vast range of things, but for testing Swift what it usually boils down to some fairly standard steps.
First you select which system and tool versions to build on. For the mac, the macOS-latest image gives you the latest releases of macOS and Xcode. For Linux, there are Docker images available for Swift 5.0 and 5.1, as well as nightly builds of the latest Swift.
Then you clone your package with git.
Next you perform a build, using either swift build or xcodebuild build, depending on the platform you’re on.
Next you run some tests with swift test or xcodebuild test.
There are plenty of other things you can also do (for example posting notifications, uploading files), but a simple file that just builds & tests on the Mac might look something like this:
name: tests
on: [push, pull_request]
jobs:
  macos:
    name: MacOS
    runs-on: macOS-latest
    steps:
    - name: Checkout
      uses: actions/checkout@v1
    - name: Build
      run: swift build -v
    - name: Test
      run: swift test -v -c release
So far so good…
Bookish Development Diary, episode 7.
Ok, I admit it, I fell down a bit of a rabbit hole a couple of weeks ago.
Quite a lot of my open source packages have some sort of unit tests, and I’d been using Travis-CI as a way of running them, with CCMenu to monitor them locally.
Recently though I’ve been experimenting with Github Actions instead of Travis. They work really well, and I think I’m going to switch over to using them for everything.
The one thing I miss though is CCMenu. So I decided to see how quickly I could hack together a replacement. It was also an excuse to play around with SwiftUI…
Bookish Development Diary, episode 6.
Call me an idiot (“Sam, you’re an idiot” - ed.), but whenever I try to use UISplitViewController, I seem to get myself into a tangle. It doesn’t work the way I expect it to.
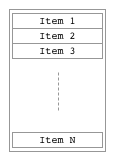
What I generally want is an index view side-by-side with a stack of detail views.
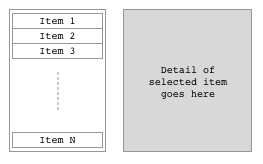
If I’m on a phone, or a horizontally-compact environment, I want the index to collapse onto the stack, so that there’s just one view. Tapping an index item here should push the detail view onto the stack, replacing the index.
Assuming that I’m not restoring the previous state of the app, this is how things should start in a compact environment. I definitely don’t want the app to start showing an empty detail view, and hiding the index 🤦🏼.
If the view is collapsed and some detail is showing, I don’t want to be able to pop up the index view, or slide it over the detail.
I just want to be able to pop the navigation stack to get back to the index.

This is not rocket science!
I’m sure that you can get UISplitViewController to behave like this, but invariably I seem to end up having to jump through a lot of hoops to do it, and even then sometimes do it wrong.
I hit this situation yet again whilst working on an example viewer app for Datastore, so I started wondering how easy it would be to just throw it away and make something simpler…